Order Destinations
Order destinations are used on the POS to control the sale of products by type of order, for example Eat In / Take Away / Delivery etc.
When Kitchen iQ receives orders that have order destinations applied to them during the order stages, the operator might need to be aware during the order stages that the items should be prepared differently based on their destination. For example, a take away or delivery item would need to be packaged rather than being served on a plate.
| Option | Description / Usage |
| Name | The name given to the order destination in Kitchen iQ (multiple POS order destinations can be mapped to a single destination within Kitchen iQ) |
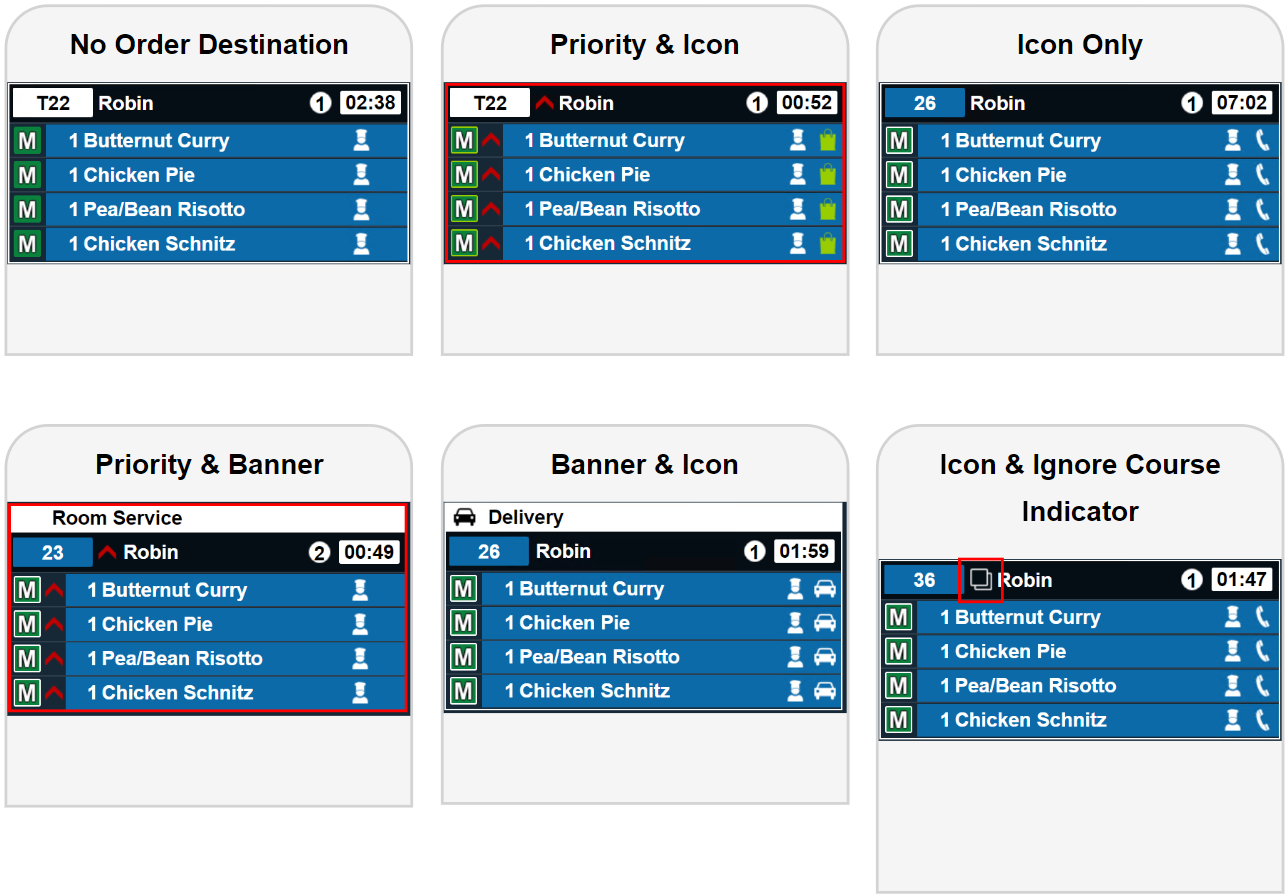
| Ignore Coursing | Check box to define if an order that contains multiple courses should be ignored so that course rules are overridden (for example an order with starters and mains would be place mains on hold if coursing was not ignored) |
| Show Indicator | Check box to define if the multiple course indicator icon should be shown (when courses have been ignored) - this helps to understand if another ticket is showing on a separate station |
| Prioritise | Check box to define if an order destination should be prioritised above other orders |
| Colour | Define the colour of the order destination icon if used. HEX code can be applied. |
| Icon | Drop down to define the icon of the order destination if used - multiple icons are available |
| Show Banner | Check box to define if a header banner will be used against the order (panel view) - banner will display the name of the order destination at the top of the ticket |
| POS Destination | Drop down to define the mapping of POS order destination to those within Kitchen iQ |
Order Destinations can be used in Routing Rules to direct items to different stations but is optional and not required to setup a basic configuration

Adding New Order Destinations
-
Select the Order Destination tab
-
Click Add
-
Enter the order destination Name
-
Select the required configurations for:
-
Ignore Coursing
-
Show Indicator
-
Prioritise
-
Colour
-
Icon
-
Show Banner
-
-
Select the required POS Order Destinations from the drop down
-
Click Save
Example Panel View Displays with Order Destination Configurations